
Cricut's "Slice" Tool Explained: When Cutting a Shape in Half Beats Attach or Weld
The Cricut slice tool cuts overlapping shapes apart into brand new, separate pieces. That's different from weld, which merges shapes together, and different from attach, which just locks shapes in place without changing them at all. Most people learn weld and attach first, since those two show up in nearly every beginner tutorial, and never touch slice until a project actually calls for splitting something apart. By then it feels like a mystery tool nobody explained.
What Slice Actually Does
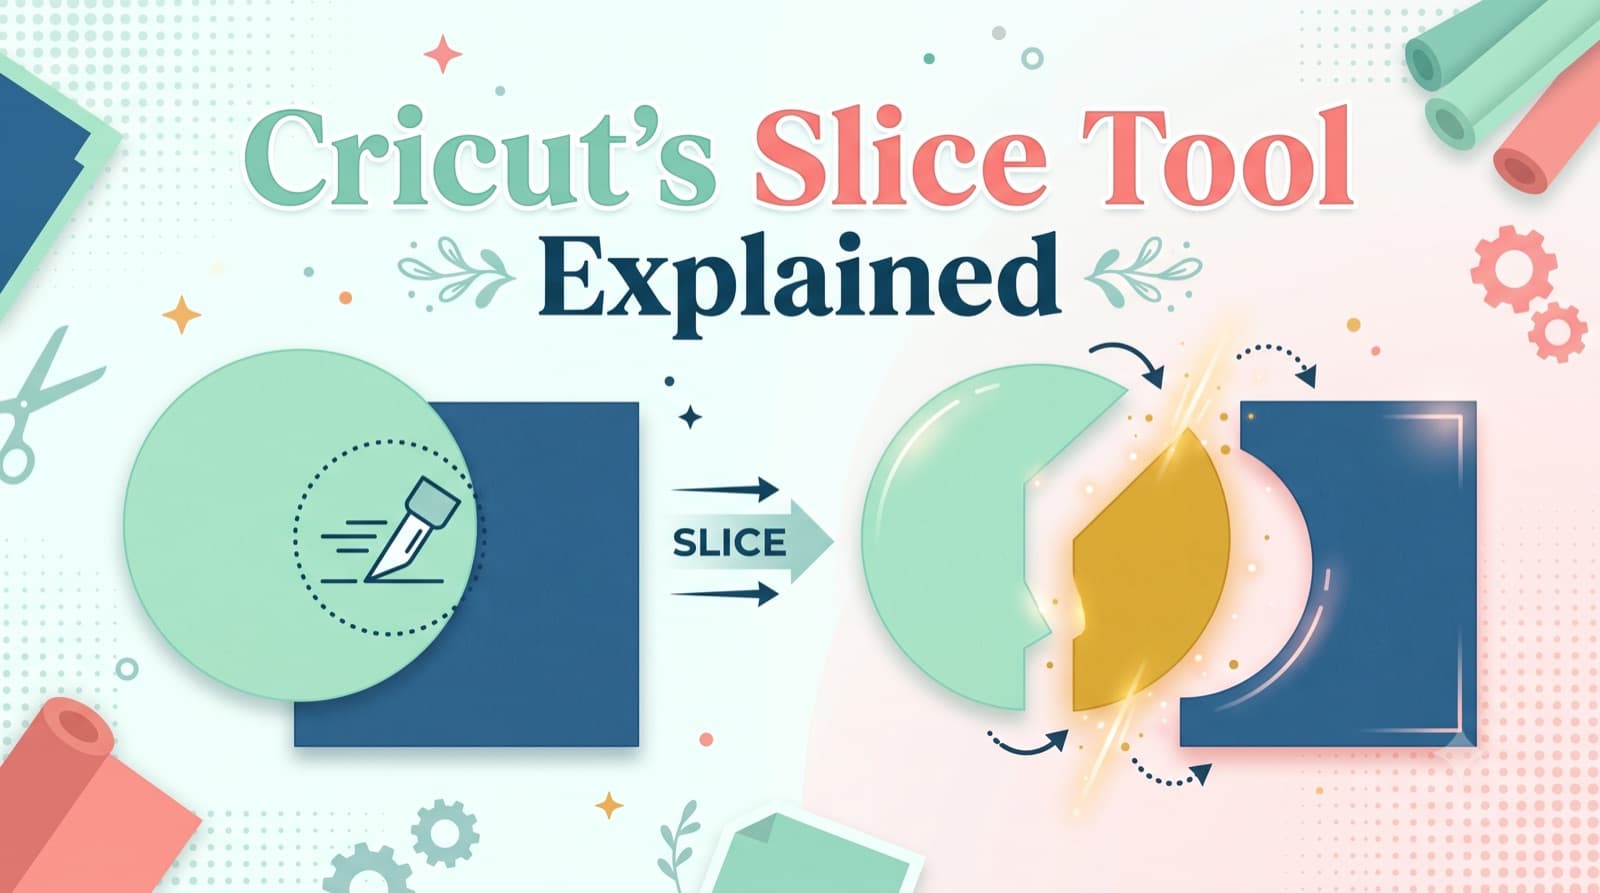
Slice looks at where two shapes overlap, cuts along that overlap line, and turns everything into new independent pieces, including the overlapping area itself.
Take a circle overlapping a square. Slice that combo and you get three separate shapes: the leftover part of the circle, the leftover part of the square, and the lens-shaped piece where they crossed. Each one becomes its own layer that you can move, recolor, hide, or delete on its own. Nothing stays connected to anything else once slice runs.
Compare that to weld, which takes those same two overlapping shapes and fuses them into a single connected outline with no seams. Slice pulls apart. Weld pushes together. They're almost mirror opposites of each other, which is part of why people mix them up so often. If your goal involves the word "separate" or "split" in any form, you're looking for slice. If it involves "combine" or "join," that's weld.
Cricut Slice vs. Weld vs. Attach, Side by Side
These three tools get confused constantly because they all involve two or more shapes interacting with each other on the canvas. Here's the actual difference, laid out plainly:
- Weld: Merges overlapping shapes into a single connected cut path. Great for combining letters into a monogram, joining pieces so there's no visible gap, or turning several small shapes into one clean outline.
- Attach: Keeps separate shapes in a fixed position relative to each other without changing their shapes at all. Use it when you need pieces to cut and stay lined up exactly as arranged, like a shadow layer sitting under text, or small dots that need to land in a precise spot on a larger design.
- Slice: Cuts overlapping shapes into new, separate pieces along the overlap line. Use it when the goal is division, not combination, and when you specifically need the overlap area to become its own standalone shape.
The quickest way to remember the difference: attach changes nothing about the shapes themselves, weld removes the boundary between them, and slice adds new boundaries where there weren't any before.
If you're still fuzzy on how weld and attach work individually, this walkthrough on building SVG files for Cricut covers both in more depth, including when each one tends to trip people up.
When Slice Is the Better Move
Slice earns its place in a handful of specific situations that weld and attach simply can't handle:
- Cutting a window or cutout into another shape. Slicing a name across a banner cuts the letters directly out of the banner shape, leaving a see-through window instead of layering text flat on top of it. This is the effect a lot of people are chasing when they try weld first and end up confused about why the letters just disappear into the background.
- Splitting a design into layers for different colors. If a design needs one color of vinyl for the background and a different color for an overlapping accent shape, slice separates them cleanly into pieces you can send to different mats or cut in different colors of cardstock.
- Building a stencil. A proper stencil needs the overlap area to become its own removable piece, not just a visual overlap. Slice does exactly that, which is why it comes up constantly in stencil-making tutorials even though it rarely gets explained on its own.
- Making two shapes that fit together like a puzzle. Overlapping any two shapes and slicing them gives you complementary pieces that interlock perfectly, which is handy for layered card designs, inlay-style projects, or two-tone ornaments where the pieces need to nest together.
How to Slice in Cricut Design Space
That's the whole process. No settings to configure, no dialog boxes to click through. There's no menu explaining what it does, it just runs.
Why the Slice Tool Sometimes Grays Out
The slice tool grayed out in Cricut Design Space almost always comes down to selection, not a bug in the software. Slice needs exactly two shapes selected that actually overlap. Select only one shape and it grays out immediately. Select three or more shapes and it grays out too, since slice doesn't know how to divide three-way overlaps. Select two shapes that don't touch at all and it grays out for the same reason: there's no overlap line for it to cut along.
One thing that trips people up more than the graying out itself: layer order matters for slice, not just the outlines of the shapes.
With overlapping layers, the Slice tool goes by canvas stacking order. The top layer determines which piece keeps its color and comes out on top after the cut. If a slice comes out with the wrong shape holding the wrong color, or a piece you expected to be on top winds up underneath, check the layer order in the panel before assuming the tool did something wrong. Reordering the layers and re-slicing usually fixes it.
Skipping the Manual Slice When the File Is Already Built Right
Slice is the right fix when you're deliberately combining two separate shapes on the fly for a specific project. But a lot of "I need to slice this" moments only happen because an SVG's layers weren't separated correctly in the first place. A file gets imported with paths that are technically overlapping but never got split apart during design, so every single project built from that file needs a manual slice before it'll cut the way it should. That's a workaround for a file problem, not a design choice.
Running the file through CutMagic's SVG Fixer catches that at the file level, before it ever reaches Design Space. It checks for layer and path issues automatically, so shapes that should already be separate arrive separate, and there's nothing left to manually slice on the canvas. It doesn't replace slice as a technique, it just means you're only using slice when you actually mean to, not as a repeated patch for the same broken file.
This overlaps conceptually with another common fix: the difference between Delete and Release Compound Path, which deals with a related kind of path-level separation problem that shows up during weeding rather than during design.
The Takeaway
Weld, attach, and slice all solve different problems, and none of them is a universal substitute for the other two. Before reaching for any of them, ask what the goal actually is: merge shapes together, hold shapes in a fixed position, or split shapes apart. Once that question has a clear answer, picking the right tool takes about two seconds, and the slice tool stops being the one nobody remembers how to use.